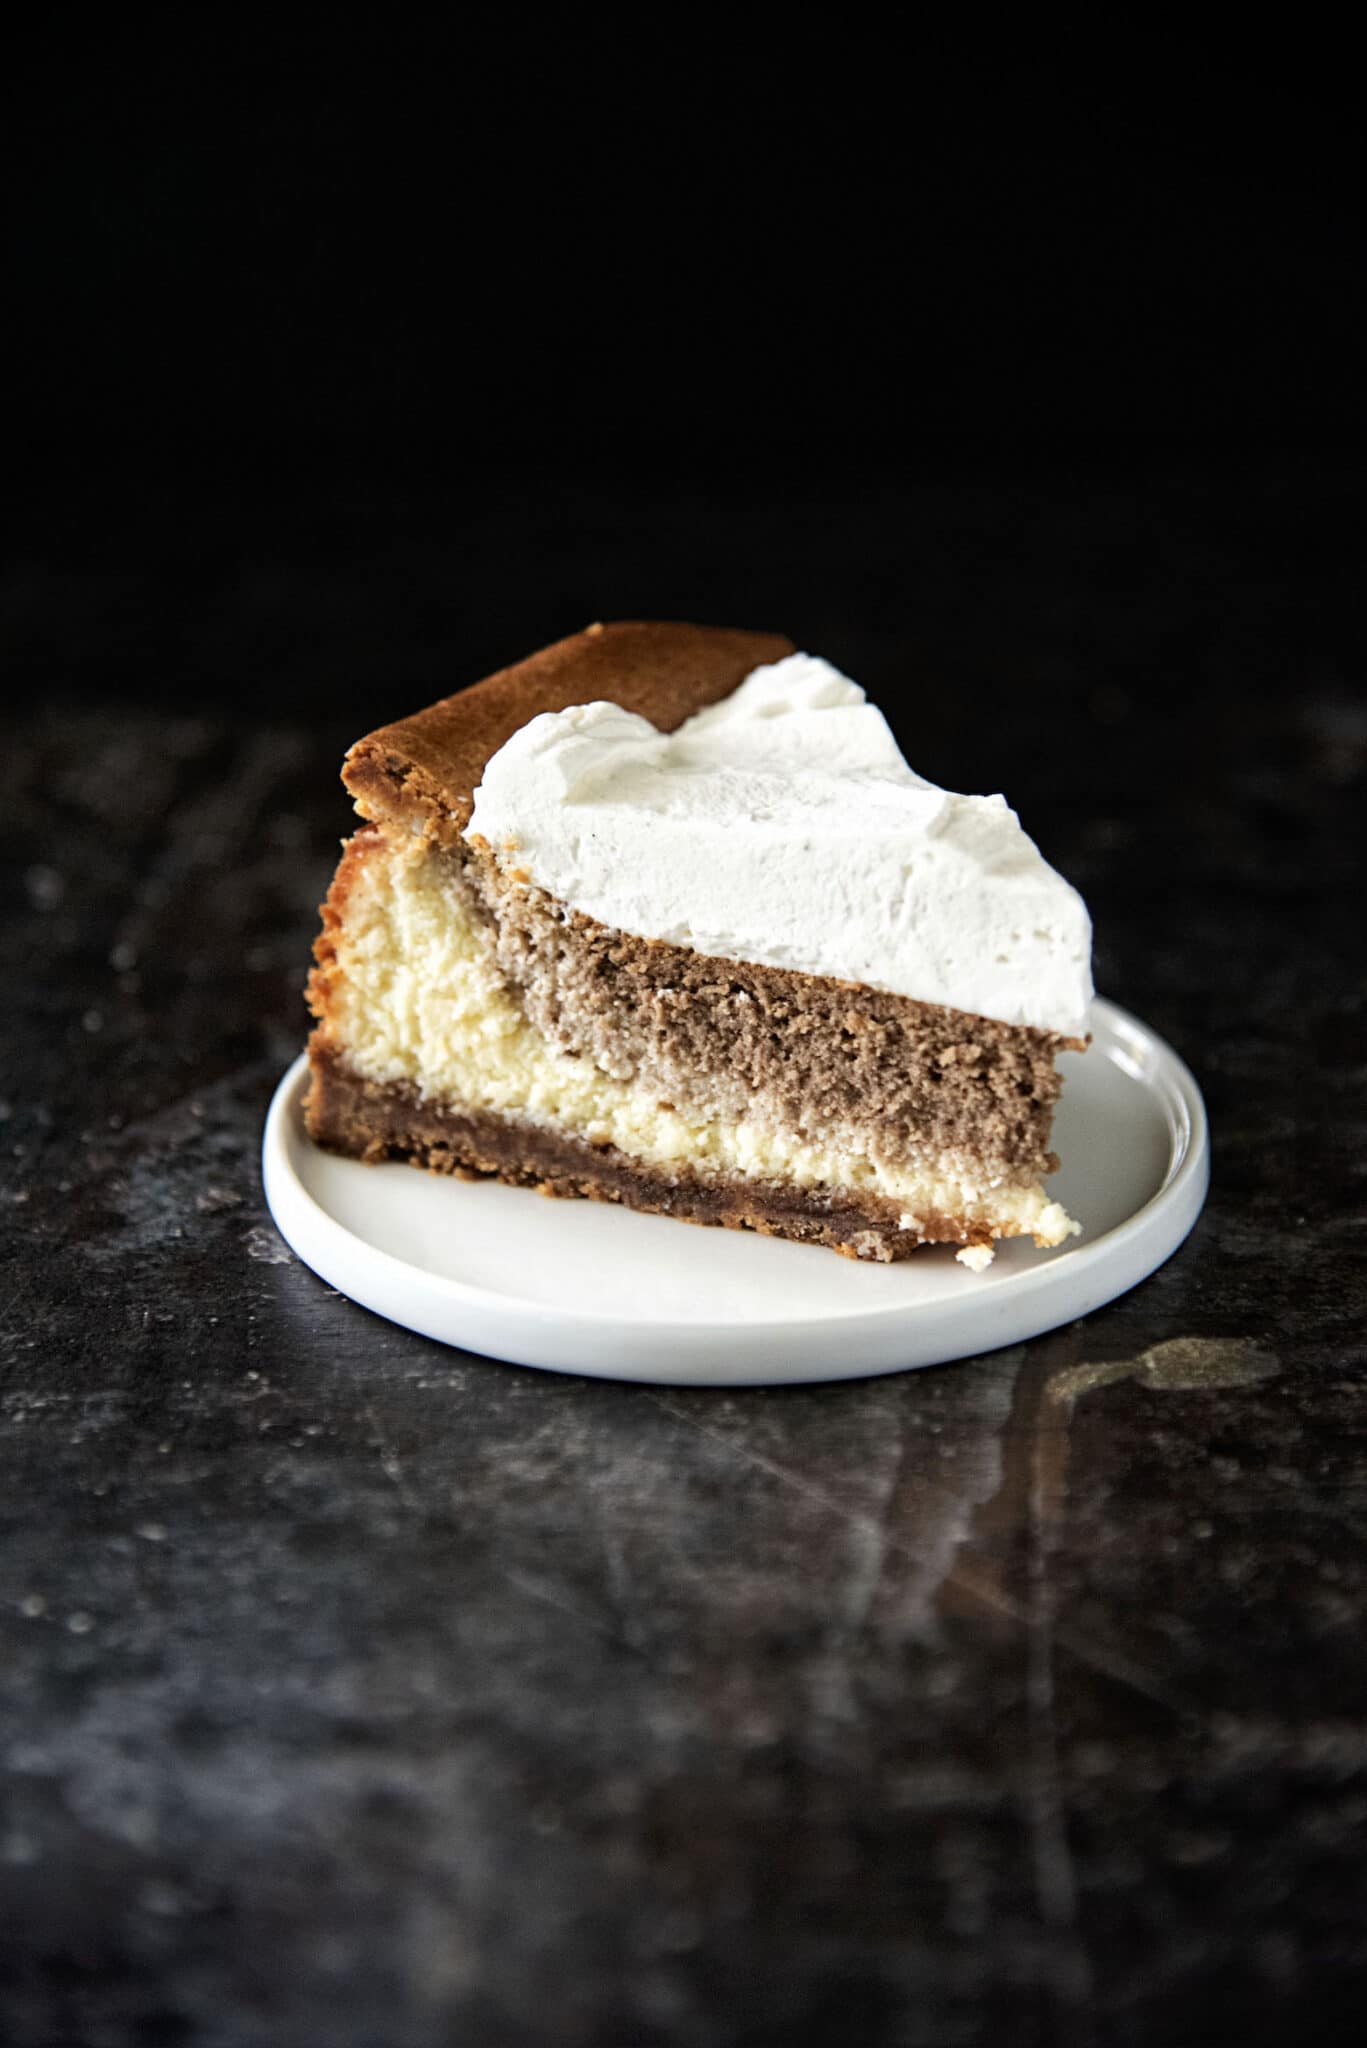
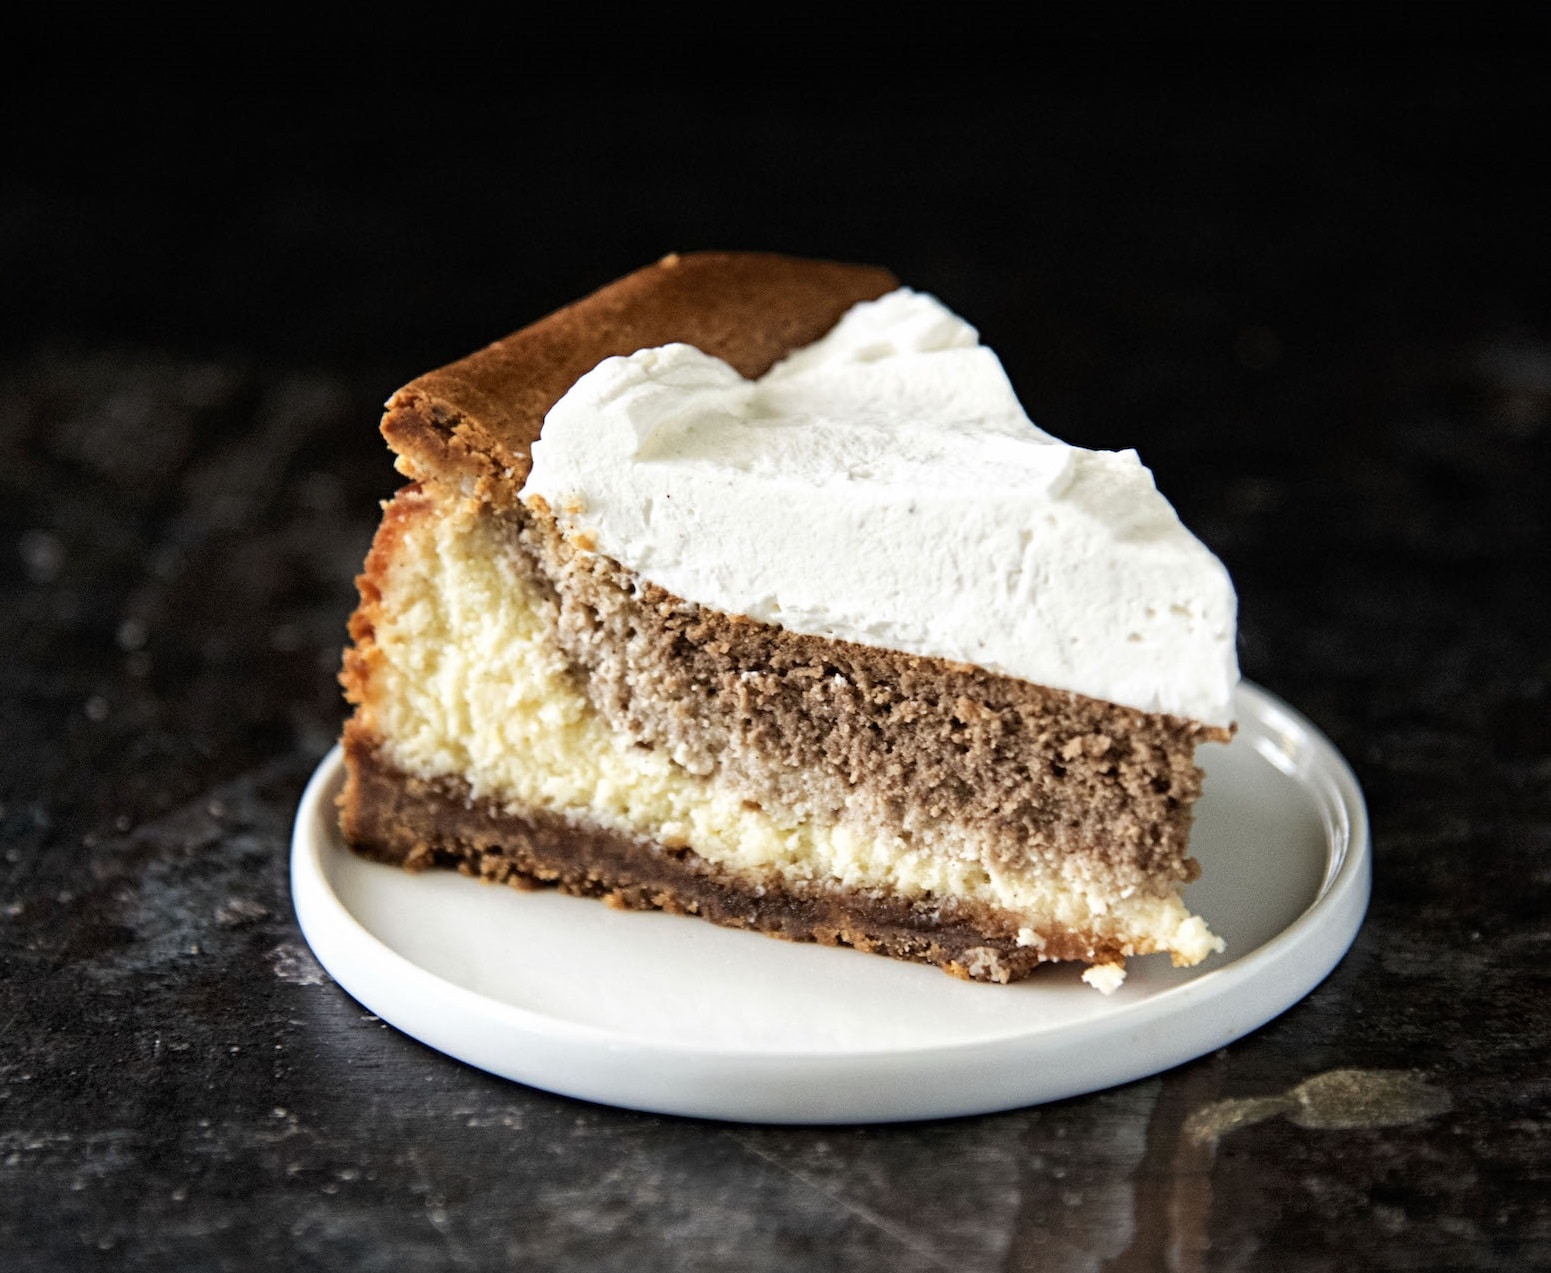
Multi-layer creamy cheesecake with a vanilla cookie crust a vanilla bean bottom layer, chai spice layer in the middle, and a chocolate espresso center. Irresistible!
- Easy
- 120 mins
- 12 servings


Ingredients
Crust:
- 6 oz vanilla flavored wafer cookies
- 3 TBSP brown sugar
- 1/2 tsp. Rodelle Pure Vanilla Extract
- 3 oz unsalted butter
Filling:
- 2 1/2 lbs. (5 80z packages) cream cheese, at room temperature
- 2 1/2 cups granulated sugar
- 3 TBSP flour
- 5 eggs
- 2 egg yolks
- 1 TBSP Rodelle Vanilla Extract
- 1 Rodelle vanilla bean, split and seeds used, pod discarded
- 2 tsp. chai spice
- 1 1/2 tsp. espresso powder
- 1 TBSP Rodelle Cocoa Powder
Uses
Directions
For the crust:
- Place cookies in a food processor.
- Grind to make crumbs.
- Add in remaining ingredients.
- Process to blend.
- Pat crust mixture into a 10 inch spring form cake pan.
- Bake at 325F for 5-7 minutes.
For the filling:
- Cream the cheese on medium speed until very soft and creamy.
- With the mixer running, add the sugar.
- Beat until well combined.
- Stop the mixer and scrape down the bowl.
- On low speed add the flour.
- Then add the eggs one at a time, stopping the mixer before adding each egg so that shell does not get into the batter.
- Scrape down the bowl at least twice while adding the eggs.
- Add the vanilla beans and vanilla extract.
- Scrape down the bowl.
- Take out 1/3 of the batter and place into a bowl.
- Add the chai spice to that bowl and mix until fully incorporated.
- Remove another 1/3 of the batter and put into another bowl and add espresso and cocoa powder and mix until fully incorporated.
- Pour 1/3 of the original batter into the prepared pan with crust.
- Then pour the chai spice batter on top of that.
- Followed by the remaining 1/3 of the chocolate espresso batter.
- Bake at 325F for 1 1/2 to 2 hours.
- Let cool to room temperature.
- Then refrigerate for at least 4 hours, preferably overnight.
- Serve with whipped cream.
Note: This recipe was prepared for Rodelle by SweetRecipeas. Click here to see the original post and more helpful tips!