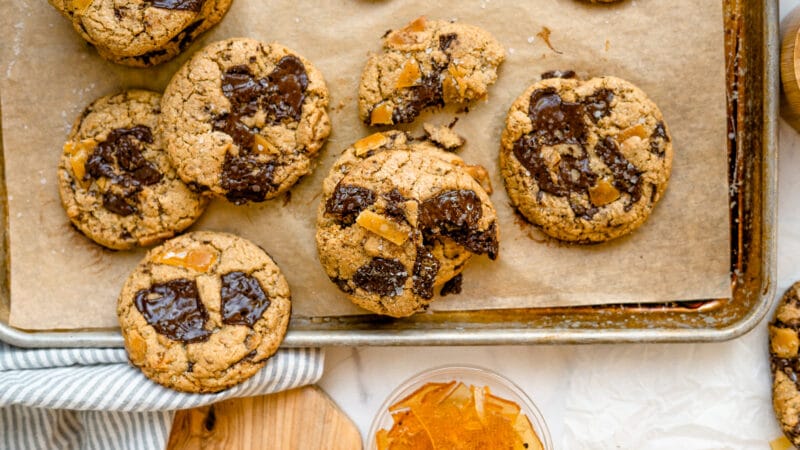
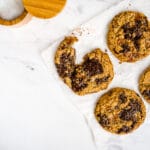
Nutty browned butter is creamed with a combination of white and brown sugars (the smell is intoxicating), flour, and coarsely ground rye flour. The final dough is gently blended with small pieces of homemade vanilla caramel shards and hand-chopped dark chocolate. The cookies have nice crispy edges and gooey center with puddles of melted dark chocolate on top. If these cookies aren’t show-stopping enough, they are topped with a sprinkling of coarse sea salt. The perfect sweet and salty cookie!
- Medium
- 80 mins
- 18 servings






Ingredients
For the caramel shards
- 1 cup granulated sugar
- ¼ cup water
- 1 tsp Rodelle vanilla extract
For cookies
- 1 cup butter, salted
- 1 cup brown sugar
- 1 cup granulated sugar
- 2 eggs
- 2 tsp Rodelle vanilla extract
- 2 cups all-purpose flour
- 1 cup coarse dark rye flour
- 1 tsp baking powder
- ½ tsp baking soda
- ¼ tsp kosher salt
- 9 oz 72% dark Belgium chocolate
Uses
Occasions
Directions
- To make the caramel shards, add 1 cup of sugar to a small saucepan along with ¼ cup water. Stir with a spoon, making sure not to get very much of the sugar granules up the sides of the saucepan. Line a rimmed baking sheet with a silicone mat. Place the saucepan over medium-high heat. Dip a pastry brush into a bowl of cool water and brush any sugar granules down into the sugar mixture. Allow the mixture to come to a boil. Do not stir the mixture with a spoon any longer. Once the mixture starts to turn a light brown in the middle, begin to swirl the pan occasionally until the sugar is a dark amber color. From start to finish, this process will take about 15 minutes, or about 10-12 minutes once it starts to boil. When the color reaches a dark amber color, add the vanilla extract. Swirl the caramel to mix in the vanilla, then pour the caramel immediately onto the silicone mat, tilting the pan to spread the caramel into a thin layer.
- To make the browned butter add the butter to a small saucepan over medium-high heat until the butter is completely melted. Continue heating until the butter begins to bubble vigorously. Turn the heat down to medium and allow the butter to simmer until it starts to foam. Watch it carefully as the foam will turn from white to a golden brown color. Immediately pour the browned butter into the bowl of a stand mixer. This process will take about 10 minutes. Place the bowl into the fridge to bring the butter to room temperature or slightly below (it will be opaque when ready).
- Preheat an oven to 350 F. Once the butter has cooled down, add both sugars and mix it together using a paddle attachment for 5-7 minutes, scraping the bowl as needed.
Add the eggs one at a time and vanilla extract, mix for 1-2 minutes until the mixture is pale in color. - Combine all the dry ingredients, which include the flours, baking powder, baking soda, and kosher salt. Then add ⅓ of the dry ingredients at a time, mixing after each addition until there is only a small amount of dry ingredients left to be incorporated.
- Chop the dark chocolate and break the caramel into small shards.
- Add ⅔ of the chopped dark chocolate and ⅔ broken caramel shards.
- Mix until just combined. Portion the cookie dough into 2 ¾ - 3 oz balls and roll them in your hand to make them round. Top each dough ball with the reserved chopped chocolate and caramel shards. Place them on a parchment-lined baking sheet, about 2” apart. You should be able to fit 6 cookies onto a half sheet tray.
- Bake cookies for 16-18 total minutes, rotating the pan halfway through or until the cookies are golden brown on the edges and mostly flat. While the cookies are baking, roll the cookies out so they are ready to go and store them in the fridge until the first batch is finished. If you want crinkly edged cookies, feel free to tap the sheet tray onto the counter once when they come out of the oven.
- Allow the cookies to cool for 2-3 minutes on the sheet tray before attempting to transfer them to a cooling rack.
Tip
For perfectly round cookies, take a round cookie cutter that is larger than the cookies and swirl the cookie cutter around the cookie while it is still warm to shape it into a nice, even shape.
Note: This recipe was developed and photographed for Rodelle by Amanda at From Me to Vuu.