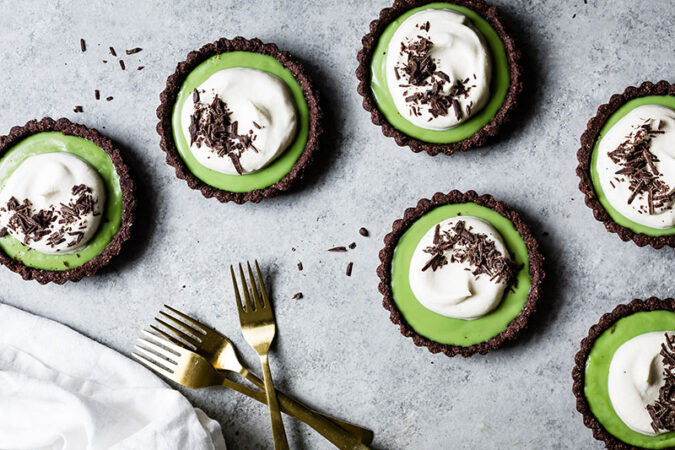
Mini chocolate matcha cream tarts have a matcha pudding filling in a rich dark gluten-free cocoa almond cookie crust (with a bittersweet chocolate shell) and pillows of vanilla whipped cream on top!
- Easy
- 60 mins
- 6 servings
Ingredients
Gluten-Free Cocoa Crust:
- 1 cup + 2 tablespoons (117g) finely ground almond flour
- ½ cup + 1 tablespoon (60g) Rodelle Organic Baking Cocoa
- ½ cup (55g) gluten-free oat flour
- 2 tablespoons + 1 teaspoon (15g) tapioca flour
- ¼ cup (55g) cane sugar
- 1/4 teaspoon kosher salt
- 7½ tablespoons cold, unsalted butter, cut into ¼-inch cubes
- 1 teaspoon Rodelle Organics Pure Vanilla Extract
- ½ teaspoon Rodelle Organics Chocolate Extract (or replace with additional vanilla extract)
- 2 ounces bittersweet chocolate, finely chopped, plus more for garnish, if desired
Matcha Cream Filling:
- ½ cup + 2 tablespoons cane sugar
- 3½ tablespoons cornstarch
- 1 tablespoon high-quality matcha powder
- ¼ teaspoon kosher salt
- 2½ cups whole milk
- ¼ cup + 2 tablespoons heavy whipping cream
Whipping Cream Topping:
- 1 cup heavy whipping cream
- ¼ cup powdered sugar, sifted
- 1 teaspoon Rodelle Organics Pure Vanilla Extract
Uses
Directions
Gluten-Free Cocoa Crust:
- In the bowl of a stand mixer fitted with the paddle attachment, sift together the almond flour, baking cocoa, oat flour, sugar, and salt. (Alternatively, use a food processor).
- Add the butter cubes and drizzle with vanilla and chocolate extracts.
- With the mixer on medium-low, beat until the dough begins to clump and the butter has been completely combined about 3-5 minutes. At first it will be very crumbly, but eventually, it will clump together when pinched with your fingers. If using the food processor, pulse until the dough begins to clump together.
- Divide the dough into the bottom of size 4-inch tart pans with a removable bottom and begin pressing the dough evenly into the pan, starting with the sides and then moving to the bottom. Your crust should be between ⅛ and ¼-inch thick with the top edges squared off.
- Prick the bottom all over with a fork, place on a baking sheet, and chill in the fridge until firm, 15-30 minutes.
- Meanwhile, preheat the oven to 375°F.
- When the tart shells are firm, bake on the middle rack for 16-18 minutes, or until it looks firm, but does not yet smell burnt or look too dark.
- Remove from the oven and while the crust is still hot, use the back of a spoon to gently press down on the sides and bottom to help hold it together as it cools. While the crust is still hot, divide the chopped chocolate among the tart shells. Let sit for 2-3 minutes, then use a spoon to swirl the chocolate into the bottom of the shell. Chill while you prepare the filling.
Matcha Cream Filling:
- In a medium saucepan, whisk together the sugar, cornstarch, matcha powder, and salt. Whisk in the milk and cream. Over medium heat, cook, whisking constantly, making sure to scrape the edges and bottom of the pot, until it begins to boil (if you stop whisking for a second, you'll see large bubbles pop up). Continue cooking for 1 minute just to thicken to the texture of a thin yogurt (if you cook it too long, it'll set up very gelatinously).
- Remove from heat and strain it through a fine-mesh sieve into a heatproof bowl. Press plastic wrap on the surface of the pudding to keep a film from forming and let it cool for 10 minutes.
- Use a ladle to divide the pudding between the tart shells and chill for at least an hour but up to 2 days in advance.
- Just before serving, whip the cream. In the bowl of a stand mixer with the whisk attachment or a mixing bowl with a hand mixer, whisk the cream until it begins to thicken, but peaks have not formed yet. Add the sifted powdered sugar and vanilla and continue whisking until pillowy soft peaks form.
- Spoon whipped cream over the top of the tarts and sprinkle with chopped chocolate, if desired. Serve immediately or chill for up to two days. The cream is best served immediately but will keep in a pinch!
*This recipe was prepared for Rodelle by Sarah at Snixy Kitchen. Visit her site here to read the original post, see more photos, and helpful tips!
Check out our how-to video!